-

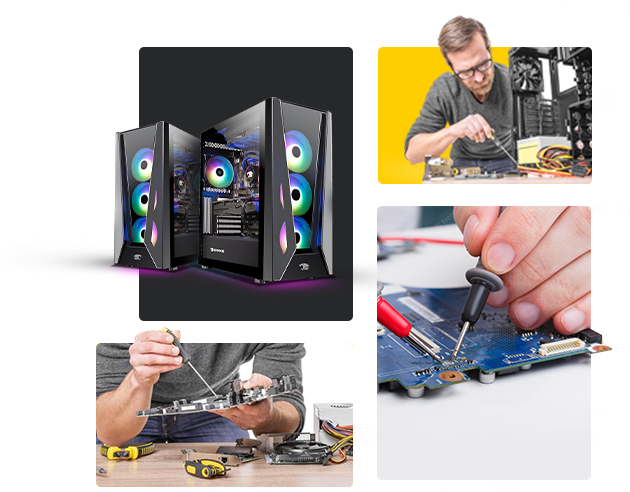
01. Build / Assembly
A crucial step, that each component is installed with precision and attention to detail, minimizing the risk of errors or damage.
- Review Work Order and Build Notes
- Review All Part Notes & Documentation
- Check Parts and Serial Numbers
- Remove Protective Film from Parts
- Core Assembly
- Test Power Supply for Correct Voltage Levels
- Assemble Core Components
- Glue CPU Fan to Heatsink
- Check for Boot of MB/CPU/RAM
- Update System BIOS to Approved Version
- Verify correct CPU and Memory Setting
- Chassis Assembly
- Verify Condition of Chassis and Panels
- Verify Adequate Hard Disk Cooling
- Apply MVP Branding to Chassis
- Rotate and Align Rear Fan
- Mount Drives
- Mount I/O Shield
- Mount Motherboard
- Check Rear Ports and I/O Shield Alignment
- Mount Power Supply
- Wiring
- Wire Front Panel Connections
- Wire Power Supply Connections
- Wire Data Connections
- Install Cards
- Hot Glue Unsecured Cables
- Verify Pre-Wiring (If Applicable)
- Finishing
- Install GPU Brace (If applicable)
- Sign System on Work order
- Apply Order Number Sticker
- Install WiFi Antenna (If applicable)
- Verify Power Supply is in Eco/Hybrid Mode
- Check for POST of fully completed system
- Verify Fan Settings
- Load BIOS Profile
- Verify Boot Order
- Verify Side Panel Fitment
- Bundle accessories
-

02. Assembly Review
Reviewing the assembly notes and documentation is essential ensure that the build process is properly documented, minimizing the risk of errors and facilitating troubleshooting if necessary.
- Verify Build Notes are Fulfilled
- We verify that our MVP branding is on your system.
- Verify Assembly Check-Off is Complete
- Verify Last Five of Windows/Office Keys (if applicable)
- Verify Plastic Film Has Been Removed
- Verify Condition of Chassis and Panels
- Verify Side Panels Are Not Stiff to Install onto Chassis
- Inspect Wiring for Tidiness (Cable Management)
- Verify SATA Cables are Labeled (RAID Only)
- Check for Additional Pre-Wires
- Verify Hot Glue on Applicable Parts
- We add hot glue to wiring to verify that connections don't come loose in shipping.
- Verify Case Feet and Case Mods are Installed
- Ensure Proper I/O Shield Mounting
- Verify All Motherboard Screws are Present and Secure
- We verify all motherboard screws are present and secure.
- Verify CPU Cooler Screws are Secure
- Verify All Populated Hard Drive Trays are Secured to the Chassis
- Verify All PCIe Card Screws are Present and Secured
- Verify All GPU Brace Screws are Present and Secure
- Verify Upper and Lower Drive Cage Screws are Secure
- Verify All Power Supply Screws are Present and Secure
- Verify Rear Fan Screws are Present and Secure
- Verify all Front Fan Screws are Present and Secure
- Verify Fan Riser Screws are Present and Secure
- Verify All Door Screws are Present and Secure
- Verify Optical Drive Screws are Present and Secure
- Verify PSU Eco/Hybrid Mode is Enabled
- Verify Cards are Evenly Seated and Ports are Accessible
- Test Power Button for Functionality and Feel
- Test Reset Button for FunctionVerify System LEDs are Working
- Verify POST Beep from System Speaker
- Install Wi-Fi Antenna
- Verify Accessories are Included with System
- Verify CPU is Recognized Properly
- Verify the RAM is Properly Recognized
- Verify Chassis Fan Orientation and Speeds
- Verify BIOS Version, Settings, and Profile
-

03. Phase 1 Testing
The initial testing phase of custom PC building involves verifying the functionality and compatibility of each component.
- Verify all fans are spinning at desired RPM/Test fan controller
- Test Reset Button (If Applicable)
- Verify front LED functionality
- Run hard drive test
- Run memory test
- Install / Setup
- Check order instructions
- Synchronize time with server
- Load Install Program
- Primary OS
- Install base operating system
- Install / update device drivers
- All the most recent drivers (downloaded from the manufacturer) are loaded for your devices.
- Install approved Windows updates
- All Windows updates and service packs are applied.
- Testing
- Check partition sizes
- Optimize settings for SSD
- Test standby mode and power off
- Test wireless connection
- Play movie DVD
- Check for sound output
- Your sound card is confirmed to output sound.
- Verify front ports (USB, firewire, eSATA, sound)
-

04. Quality Control
Quality control is a critical to ensure that each system meets the highest standards of performance, reliability.
- Review Build Log and Order Notes
- Review Temperature Logs are at Expected Levels
- Review Benchmarks Show Expected Results
- Verify Condition of Chassis
- Verify MVP Logo is Etched on Chassis
- Verify Rear IO Shield is Properly Mounted
- Check Hot Glue is Applied and Neat
- Verify Wiring is Tidy with Sufficient Slack to Devices
- Check For Loose or Missing Screws
- Verify System Fan Orientations
- Ensure Installed Components are Secured
- Check High Risk Heatsink Mountings
- Verify Expansion Cards are Seated Evenly
- Verify Accessories are Present
- Verify Documented License Keys Match Physical Copies
- Check BIOS Settings
- Verify BIOS Profile is Saved
- Verify System Detects Installed Components
- Verify MVP OS Branding
- Verify Drives are Present, Partitioned, and Labeled
- Test All External USB Ports
- Verify Functionality of Networking Adapters
- Verify Sound Quality Output
- Test All Video Outputs
- Verify Sleep Functionality
- Verify System Boots to the OS with a USB Drive Attached
- Record Wattage Draw Under Idle and Load
- Capture Idle and Load Thermal Images
- Verify Updates are Applied
- Clean Up Installation
- Record Approximate Boot Time
- Verify Proper Out of Box Experience
- Final Preparation
- Verify Restore Media is Present
- Take BIOS Screenshots
- Take Pictures of the System
- Include HDMI Cable
- Verify Power Cord and Essential Accessories are Present
- Final Chassis Cleaning
- Packing / Shipping
- Affix COA to Chassis
- Include invoice and packet
- Check latest shipping/Internal notes
- Create shipping tag and attach to box
- Install Instapak
-

05. Phase 2 Testing
Involves conducting a comprehensive stress test to ensure that all components are stable and reliable before the system is shipped.
- Double check system specs
- Stress Test (PRIME 96 and FURMARK)
- AIDA64
- Crystal Disk
- Memory Diagnostic (RAM Test)
- CPU Frequency Test
- Linpack
- Upload benchmarks and temperature logs